How Schematic Capture Works in PCB Manufacturing Process?
By:PCBBUY 06/25/2022 10:21

Once your schematics are finished and you're ready to start the PCB layout process, your design tools can help automate the transition into a physical design. Rather than exporting a netlist from the schematic editor and re-importing it into a PCB editor, the best tools can bypass this process and can directly import your component data into a new PCB layout.
If you are looking for more information about schematic capture in PCB manufacturing, please check and read the content below for more professional knowledge.
What is the transition of schematic capture in PCB manufacturing?
The schematic capture process needs to include everything within the circuit design necessary to work, including the electrical connections with its environment. Thus, attention to detail is vital; any omissions in the circuit design captured schematically can cause headaches down the line when things don’t work as expected and potentially costly diagnosis and corrective actions. However, always double-check each circuit diagram in your schematic sheets before committing to manufacturing the board. Most packages include rule check features that can uncover easy-to-miss errors like opens and shorts. These aren’t a substitute for a manual schematic design review.
To answer the question of “what is schematic capture?” It’s a process that allows the designer to simulate their circuit to validate their design and then create an optimum PCB layout with minimum effort. However, at each step of the process, the designer needs to perform careful checks to prevent errors affecting the following steps. Simulation tools and PCB design packages can make the designer’s life easier by automating the transition from schematic sheets into a PCB layout. Still, they are never perfect, and the designer should never rely on the outputs of a tool without reviewing thoroughly.
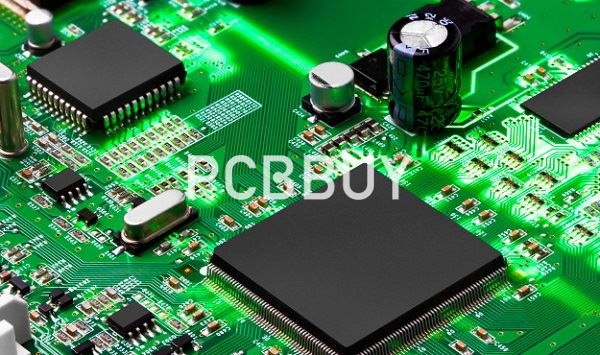
Circuit designers, PCB layout engineers, and simulation engineers trust the complete set of schematic capture tools in Altium Designer®. When a design is finished and ready to be released to manufacturing, the Altium 365™ platform makes it easy to collaborate and share your projects.
What is the process of schematic capture in PCB manufacturing?
The schematic capture part of the design process is today undertaken interactively. Prior to the schematic capture of the design, the initial high level design must be undertaken. Then in years gone by, breadboards of the circuit would be made up and made to work before committing to the schematic stage. Now with highly sophisticated circuit simulation software, the circuit is designed interactively during the schematic capture stage and the circuit simulated using software rather than building a hardware version of the circuit.

By using a computer based system for schematic capture, it is possible to enter very complicated circuits into a computer relatively quickly. It is also possible to undertake the design of the board and perform circuit simulations while the basic design is underway. In addition to this, many circuit capture systems provide a means by which the circuit revisions can be managed and configuration controlled properly. Where a circuit is being repeatedly updated, and there may be the possibility of several people working on different areas, this is of great importance.
Elements entered into a schematic have a shape associated with them for the schematic. In this way a shape designed for a particular part will be pre-drawn and appear on the circuit every time that particular type of part appears on the circuit. When using an end-to-end design suite, the full shape may also include the PCB outline, pads and the like. In this way the part number for that part defines all the elements of the part for the design.
What are the difference between schematics and PCB layout drawings?
The 2D layout of a basic circuit is not yet ready to be laid out on the printed circuit board. The printed circuit board consists of layers. The simplest PCB consists of a copper layer and a substrate layer. The copper layer is conductive and creates the circuit, while the substrate provides a surface that components can be glued, screwed, or otherwise attached to. The schematic showing where key components will be mounted doesn’t tell the PCB manufacturer how to make the PCB unless you’re making a basic breadboard.
The design process is more complex when you have a 3D schematic with thru-holes, whether this is necessary for the SMT or surface mount technology component to reach an inner copper layer or connect it to something on the other side of the board. A 3D model of your circuit board won’t necessarily give PCB manufacturers the details they need to make the product, either. This is where schematic capture and PCB layout software comes in.
How to defining electronic circuitry in PCB schematic capture?
Schematic capture is the process of designing electronic circuitry in a PCB design CAD system. As the CAD system will allow you to copy, cut, paste, or delete circuitry, design engineers often do many iterations of their work before the design is complete. There is however a basic work-flow for schematic capture which looks like this:

Component placement: The designer will start by placing the symbols on the schematic. The design tools will give the user the ability to rotate and maneuver the symbols where desired to achieve the most optimum placement. The goal here is to keep the symbols neat and organized with enough space between them to be easily readable without wasting space that could be used for other parts.
Drawing nets: Here is where the designer will connect the different component pins together in the schematic so that the nets can be routed as traces in the PCB layout. Usually, this is a manual drafting process of drawing each line, or net, from one pin to another. The designer is aided in this task with definable grids in the CAD system plus many other automated features. In some cases, the CAD system will allow the user to combine multiple nets into a single net group so that they are drawing one line instead of 8, 16, or more. Again, readability is the key, and the CAD system will usually add visible net names such as VCC or GND to clarify which net is which.
Documentation information: In addition to being an electronic database, the schematic is also a document that will be used for manufacturing, test, and fieldwork. As such it needs to have all of the necessary corporate, legal, and tracking information on it to fulfill your company’s requirements. This can include board and project names, part and revision numbers, sheet titles and numbers, and company contact information and logos.
Industry Category


