How to Find Short Circuit on A PCB?
By:PCBBUY 05/06/2022 09:33

Short circuits may also happen during reflow soldering. The solder paste may accidentally connect two pins that are very close to each other. In some cases, mistakes are made during PCB design where traces between different nets are accidentally connected.
Are you going to know the methods to find the short circuit in a PCB? If you are searching for the information about short circuit in a PCB, please check and read the content in this passage for more professional knowledge.
What are the causes of PCB short circuit?
You’ll want to take every precaution to prevent short circuits on your PCB, and this means getting down to the root causes. Some short circuits are created during manufacturing or assembly. When a thin line of copper remains during fabrication, then a hairline short will be formed.
While manufacturing and assembly are somewhat beyond your control, you can reduce short circuits resulting from design mistakes by using the right PCB design and analysis software. Use OrCAD PCB Designer and its DRC feature to detect short circuits in your nets before finalizing the design.
Short circuits can be classified according to their functionality:
· Short circuits can be classified according to their functionality:
· Short-circuit (such as: tin),
· Short circuit of PCB (such as: residual copper, hole deviation, etc.), Short circuit of devices,
· Short circuit of PCB assembly,
· ESD/EOS breakdown,
· Micro-short circuit in the inner layer of a circuit board,
· Electrochemical short circuit (such as chemical residue, Electromigration),
· Short circuit caused by other causes.
· Short circuits can be classified according to the wiring characteristics as:
· Wire-to-wire short circuit,
· Line-to-face (layer) short circuit,
· Face-to-face (layer-to-layer) short circuit.

How to check the PCB short circuit step by step?
Visual Inspection
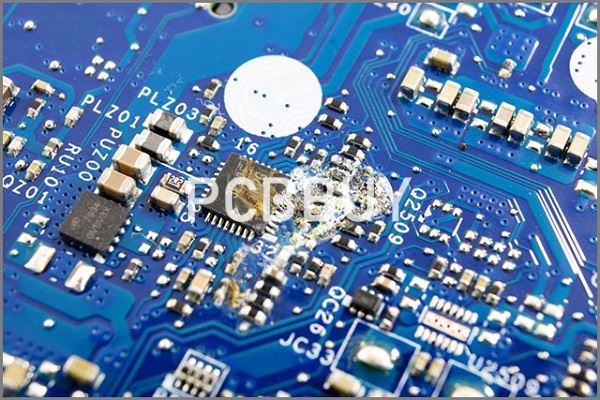
The first step is to examine the entire surface of the pcb short circuit. If so, use a magnifying glass or low-power microscope. Cracks or spots in any solder should be noted. Check all through holes. If none-plated through holes are specified, make sure this is the case on the board. Poor plating through holes can cause a pcb short circuit between layers and cause everything you have to ground, VCC or both together.
If the pcb short circuit is really serious and causes the component to reach a critical temperature. You will actually see burn spots on the printed circuit board. They may be small, but they will turn brown instead of the normal green solder.
Infrared Imaging
Using an infrared thermograph can help you locate areas that generate a lot of heat. If an active component is not seen away from a hot spot, a PCB short circuit may occur even if the short circuit occurs between the inner layers.
Pcb Short circuits usually have a higher resistance than normal wiring or solder pads because they have no benefit of optimization in the design (unless you really want to ignore rule checking).This resistance, along with the naturally high current generated by the direct connection between the power supply and the ground, means that the conductor in the short circuit of the PCB will heat up. Start with the lowest current you can use. Ideally, you would see a pcb short circuit and then cause more damage.
How to fix the PCB short circuit?
Years of PCB production and development have created numerous tests that you can use to find short circuits. Digital multimeters, ground testing, and thermal cameras are three tests that we will explore.

While many short circuits are difficult to sot, some leave obvious visible damage. Before running any more specific tests, always remember to give your PCB a thorough visual inspection.
Running a Visual test
Visual tests should be performed using a magnifying glass and a visual aid. Begin by tracing the circuitry from the power source, as it will be easier to keep track of where damage may occur. Keep an eye out for any whiskers around solder joints and pads that could lead to shorts. In some cases, burn marks or scorching may appear if a short has already occurred. These will be noticeable as the browning of a scorch mark will show up against the board’s green.
Using a Digital Multimeter
If a visual inspection doesn’t reveal anything about the cause or location of the short circuit, get a multimeter and try to identify the physical location on the PCB. Although it doesn’t pinpoint the short’s exact location, it provides an idea of where to start looking.
Using a Thermal Camera
While not an option for every company, if you have the budget to buy one, a thermal camera could help immensely. Since short circuits will lead to excessive heat output, a thermal camera will help you locate what part of the board produces the most heat. Power up the board, and if you find a component or join that is burning hotter than the rest, you will have found your shorts.
Industry Category


